Salesforce Financial Services Cloud (FSC) is a powerful platform that enables financial services firms to build stronger relationships with their clients. Installing FSC in your existing Salesforce Org can seem daunting, but with this guide, you’ll be able to do it smoothly and efficiently Install Salesforce Financial Services Cloud (FSC) Packages in Your Existing Org.
Pre-Installation Tasks
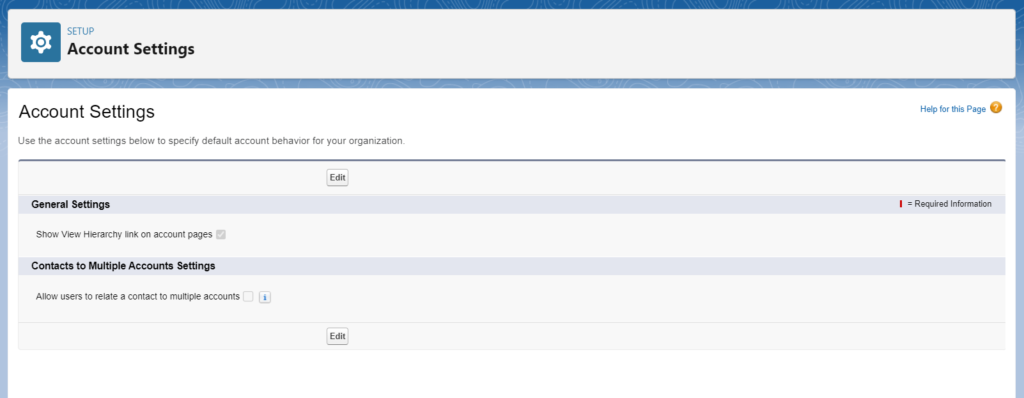
Set Up Accounts and User Profiles:
- Ensure that your Salesforce accounts are properly set up with the correct data and hierarchy.
- Configure user profiles to match the roles and permissions needed for FSC, including access to necessary objects and fields.
- Enable Person Accounts
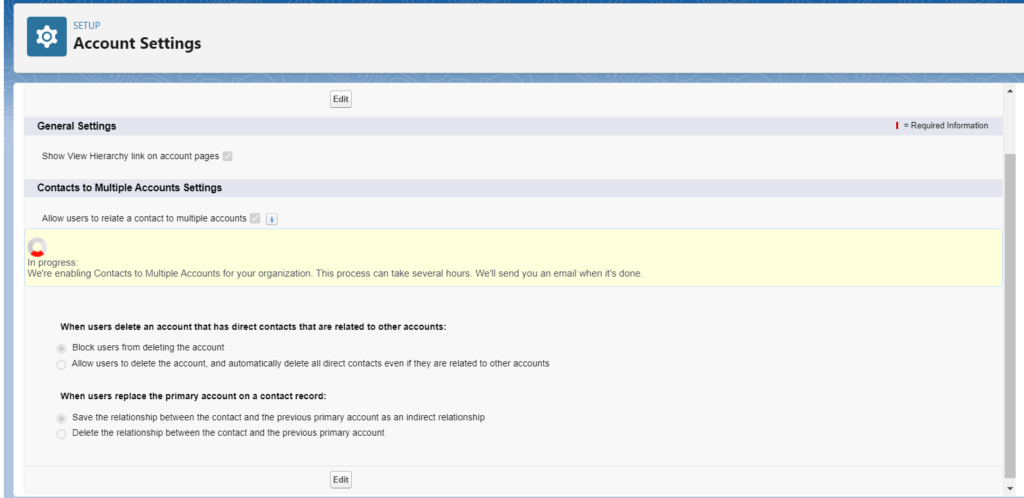
- Set Up Contacts to Multiple Accounts (ContactsToMultipleAccounts)
Step 1: Verify Your Licenses
Before you begin the installation process, ensure that the necessary FSC licenses are provisioned to your Org. This is a crucial first step as it determines what features and capabilities will be available to you once the installation is complete.
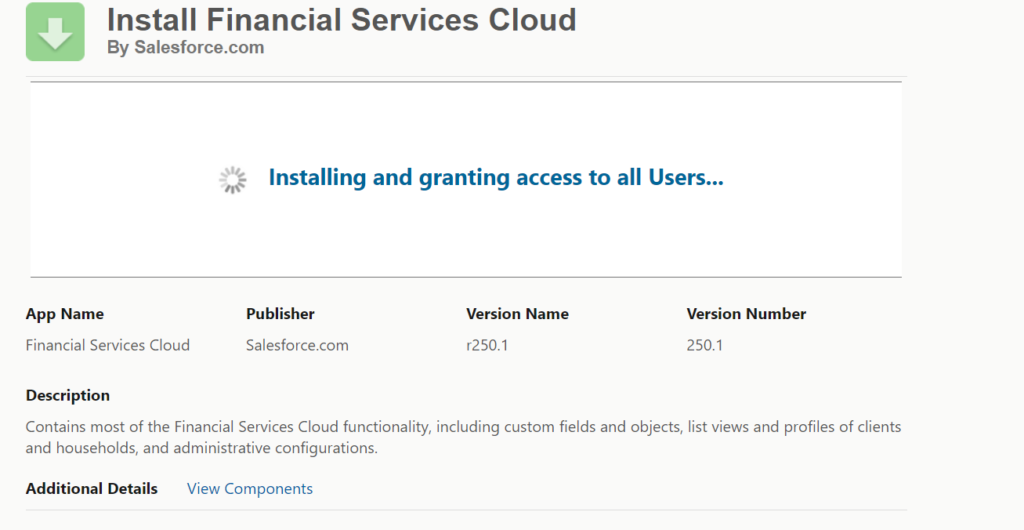
Step 2: Access the Installation Link
Salesforce provides a specific URL for the FSC managed package. You’ll need to navigate to this URL in your browser..
Step 3: Log In to Your Salesforce Org
Once you have the installation URL, enter it into your browser. You will be prompted to log in with your Salesforce Org credentials. Make sure you have the necessary permissions to install packages.
Step 4: Enter the Package Password (If Required)
If the package is password-protected, you’ll need to enter the password provided by Salesforce. This is typically communicated to you when you receive the installation URL.
Step 5: Choose Installation Settings
You will be given the option to install for all users, for specific profiles, or for admins only. Choose the option that best suits your organization’s needs.
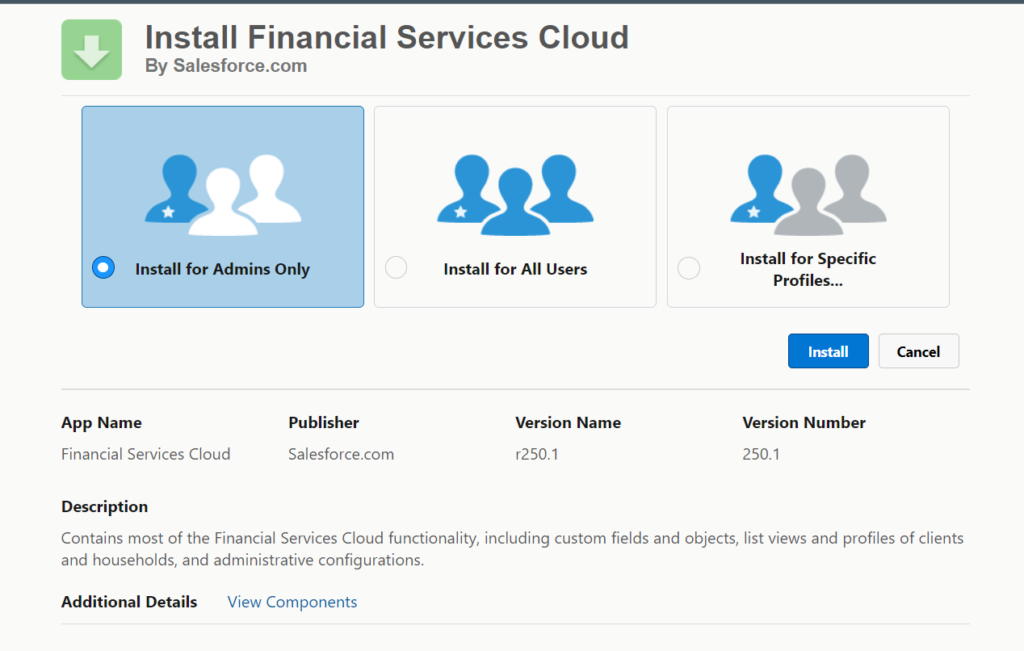
Step 6: Install the Package
After selecting your installation settings, click ‘Install’. Salesforce will then begin the installation process. This may take some time, so be patient.
Step 7: Post-Installation Tasks
After the package is installed, there are usually post-installation tasks to complete. These may include setting up page layouts, configuring settings, and assigning permissions.
- Configure Navigation to Individual and Group Profiles
- Assign a Home Page Layout to Specific Apps, Record Types, and Profiles
- Assign Lightning Pages to Display Financial Services Cloud Data
- Add Values to the Lead Status Picklist
- Add Values to the Opportunity Stage Picklist
- Add the necessary User Profile permissions to enable users to manage their books of business from Financial Services Cloud, and then create users.
- Page Layouts and Global Actions Setup
- Add Global Actions to Publisher Layouts (salesforce.com)
- Configure the Account Contact Relationship Page Layout (salesforce.com)
- Add Customer Roles (salesforce.com)
Step 8: Test the Installation
Once all installation and post-installation tasks are complete, it’s important to test the functionality within your Org to ensure everything is working as expected. Create test records, run reports, and use the system as your users would to verify the installation.
Conclusion
Installing FSC packages in your existing Org can unlock a wealth of features and capabilities for your financial services operations. By following these steps, you can ensure a smooth and successful installation. Remember to utilize Salesforce’s resources and support if you encounter any issues along the way.
Can you please put an details about the steps and typical solution approach for customers who wants to migrate from Sales to FSC ? You can add in two types like greenfield and brownfield.